
Welcome to this guide on creating a play boundary, also known as the Guardian.
- Step 1: Turning on the Headset
- To turn on your headset, press and hold the power button located on the left side of the headset for a few seconds.
- Put on the headset and adjust the head strap for a comfortable fit.
- Step 2: Launching the Application
You have two options: using your hands or the controllers.- In the menu at the bottom of the screen, select the Unframed Collection app by pinching your thumb and index finger together.
- You can also use a controller by pointing at the app and pressing the top trigger.
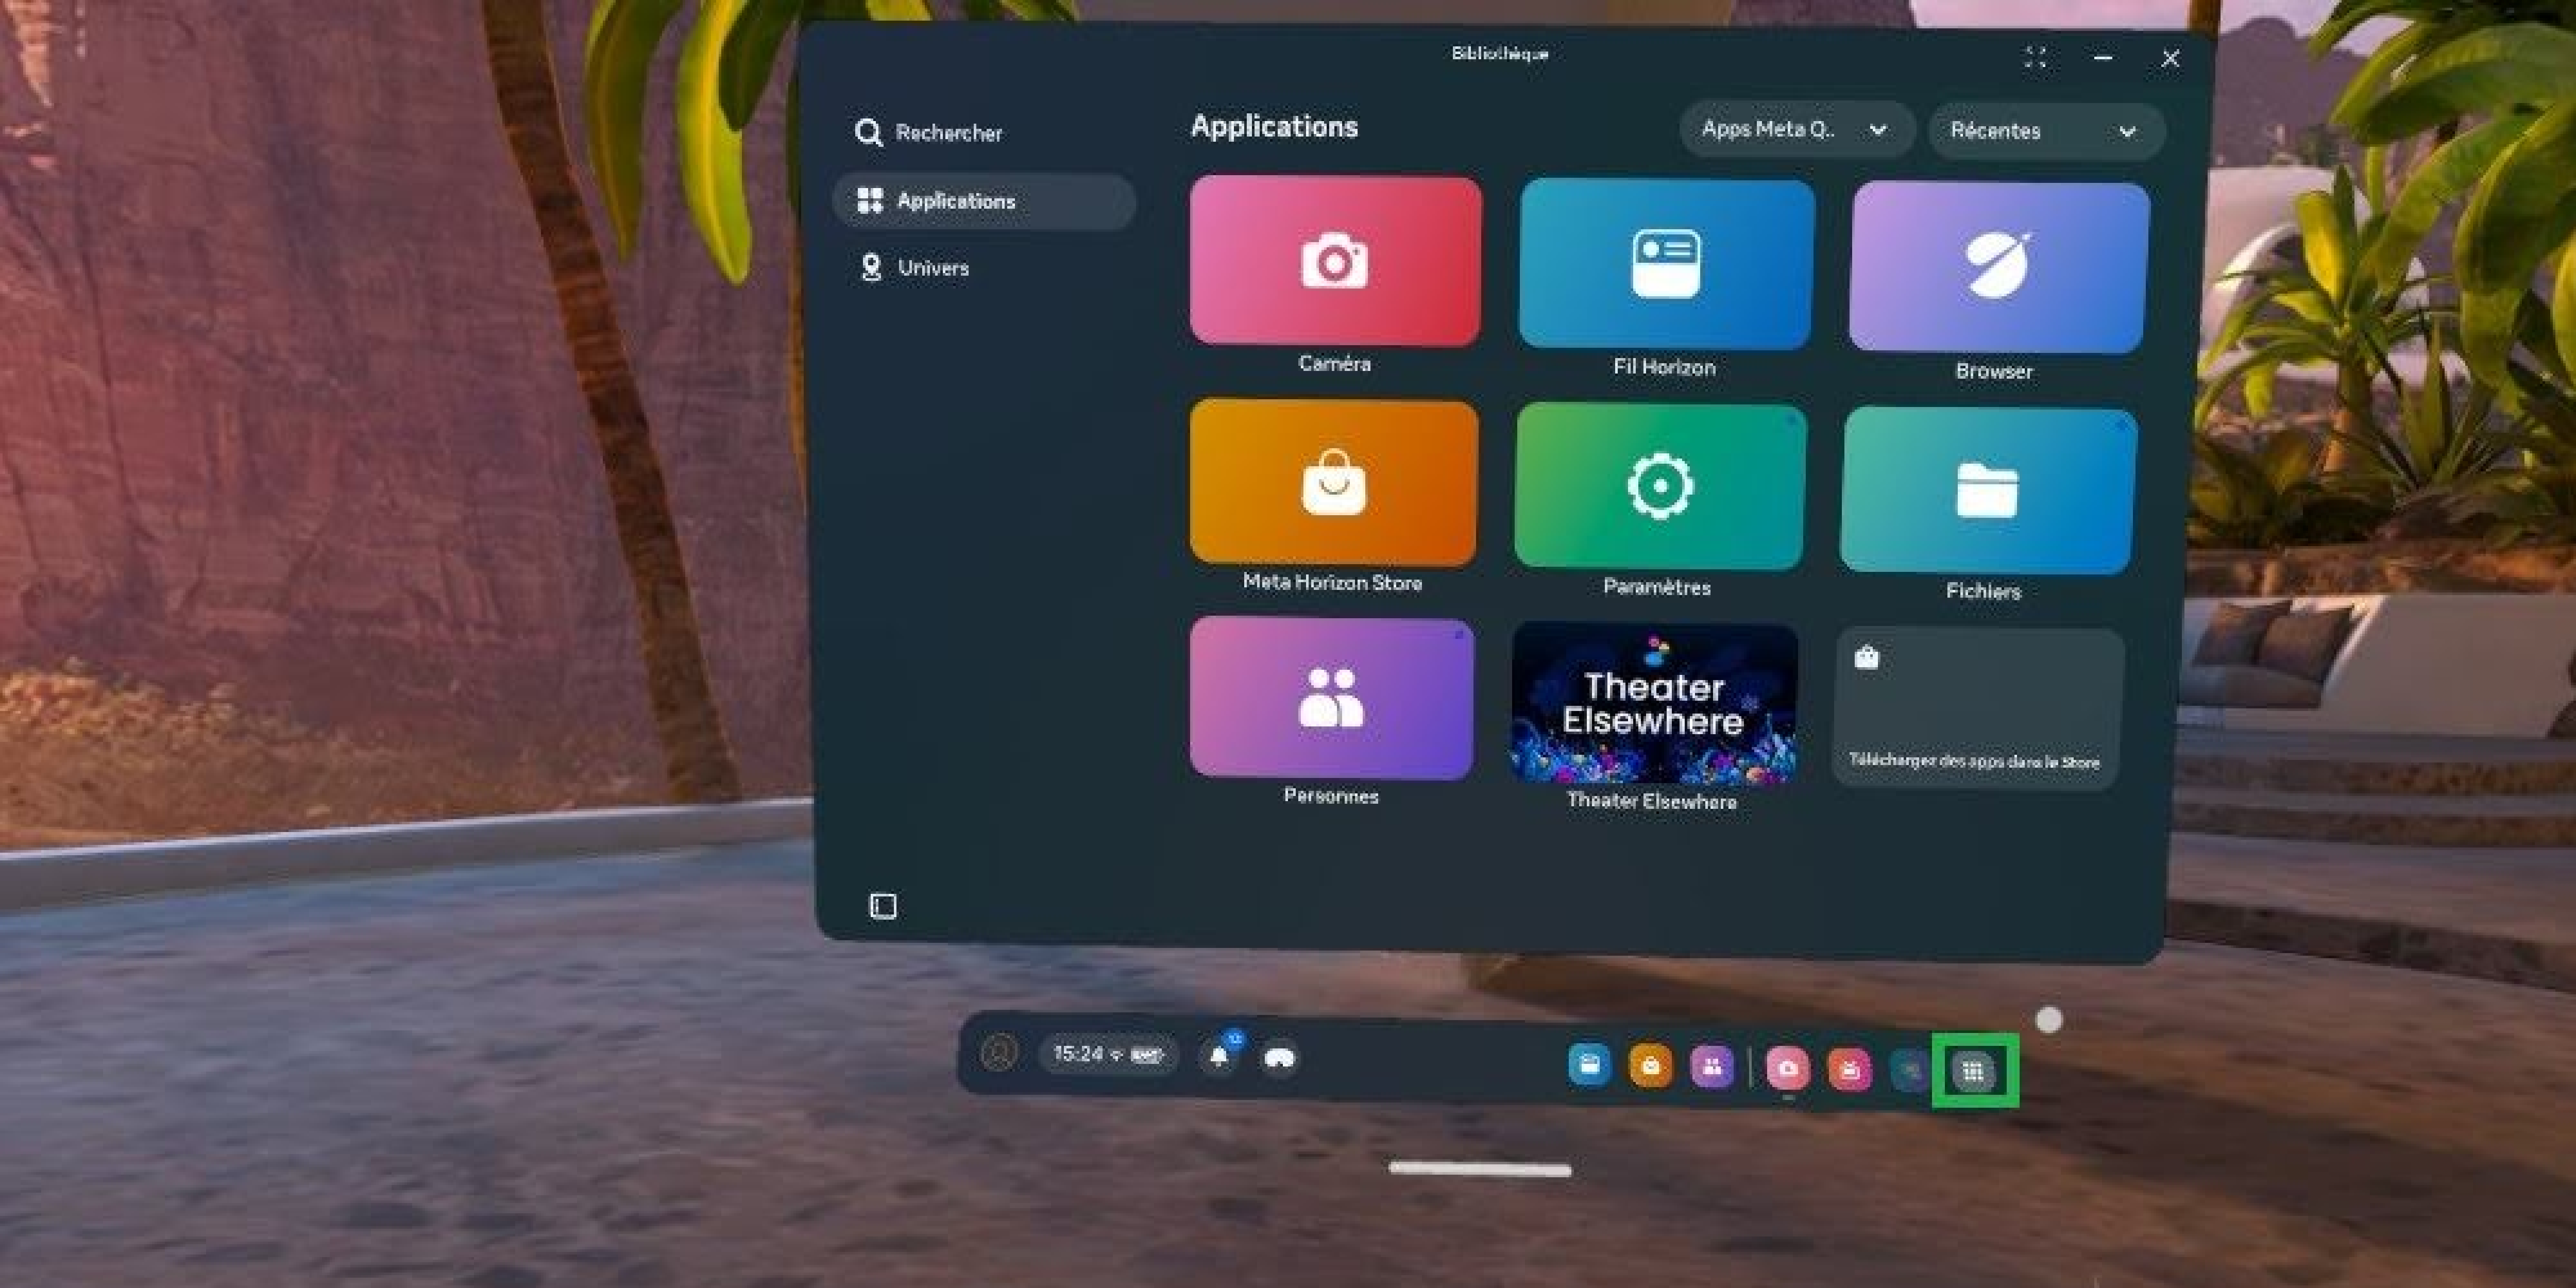
- If the application is not in the menu, you can find it under “Unknown Sources.” To access it, click on “Library“, then “Unknown Sources“, and launch the application.

- Step 3: Creating a border
There are two ways to define the play area: using the controllers or your hands.- Once the application is launched, a message saying “Border not found” will appear.
Click “Create a new border“, then “Stationary border”, using either your hands or the controllers. - Lower your hand or controller to the floor to set the correct height, then click “Confirm” once the area is properly defined.
- Once the application is launched, a message saying “Border not found” will appear.
- Step 4: Launching an Experience
- When you arrive in the gallery, look around to see the posters of available experiences.
If there are multiple rooms, use your gaze to focus on the white arrows on the ground to switch zones. - Each experience description indicates whether it is interactive and requires controllers or hand tracking.
- To start an experience, gaze down at the rectangle labeled “Start” and focus on it.
- When you arrive in the gallery, look around to see the posters of available experiences.
The experience will then begin.
